Classes/Tutorials

Showing posts with label Project Life. Show all posts

Sunday, September 18, 2016

Hello December 2016 Advent Calendar

Hello December 2016 Stampin' Up!
I hope you have been enjoying your weekend. I just got home from an amazing Holiday Catalog rollout extravaganza where we made 16 holiday cards with 4 stamp sets. I had so much fun! If you live local and want to see the projects we stamped I would love to meet for coffee to show you. There is still plenty of time for holiday card making.

Part of the afternoon includes a challenge to bring a display board to share. I love challenges! It is always wonderful to see what everyone designs and how our styles are different. Well, I happened to receive my Stampin' Success magazine within the past week and a project in that magazine caught my eye and I knew I had to copy it for my challenge project. Luckily I had already had most of the products on hand. Stampin' Success is a magazine sent to every Stampin' Up! demonstrator quarterly with project ideas and business tips. If you join my stamping team it is one of the perks you would receive.

So, a little about my advent calendar. It features the 2016 Hello December card collection & accessory pack. The card collection features 71 cards in two sizes 4x6 and 3x4. The accessory pack features a stamp set, 20 2x2 cards, 7 acetate specialty cards, lots of stickers, tree wood shapes, thread, paper clips, and washi tape. I kept my project simple and only used a few additional products - circle punch, gold binder clips, and clothespins (on sale in the clearance rack!). You could put the cards into pockets or cello bags to add a treat or small gift if you want to keep the advent calendar up for the month of December. I made this project for a display and I am going to put into an album so I did not add the pockets or cello bags. I had made the chicken wire frame awhile ago.

I do have a little confession I need to tell you as you might notice on some of my cards they have a kraft polka dot background. Well, I had started working on another project a few weeks ago. I had adhered all 31 of my beautiful red foil date stickers to the december cards in the kit alternating between kraft & white. Well, in order to use those numbers for this project I had to deconstruct my cards by punching the numbers out with a circle punch. So I now have 25 cards with holes in the middle of them! I thought you might like to see them:


I am holding memory keeping workshops if you are interested in learning more let me know. I am excited to teach you how to get those photos off your phone and computer or out of boxes and into albums to preserve them for years to come. I know I myself am guilty of having lots of family photos on my phone and in boxes as well. So we can go on a memory keeping journey together.

I have linked the products I used on this project below. Let me know if you have any questions. I hope you are inspired to check out our memory keeping products and get started today preserving your every day moments and special events.

Happy Stampin',
Christine

Supplies:
Hello December 2016 Project Life Card Collection, Hello December 2016 Project Life Accessory Pack, 1 1/4 Circle punch, Gold binder clips, Clothespins, Mini Glue Dots, Fast Fuse Adhesive

Friday, June 3, 2016

New Catalog Projects!

I hope your week is going well. It was super busy at work so I was happy to dig into my pre-order box of goodies the past two evenings after work. Stampin' Up! home office had a call for display stampers for the November Onstage event and I challenged myself to participate by creating three cards, one scrapbook page, and two 3D items. I used some new products that are available to order now. I'm not sure if I made the cut-off for the call as I write this post, but I am still happy that I accomplished the task for myself.

Card # 1 features the new Pop of Pink Washi Tape and new Thoughful Banners Photopolymer stamp set. The stamp set coordinates with the Duet Banner punch, but I wanted to show it off without using the coordinating punch. For the rhinestones I colored them black with a Sharpie.


Card # 2 again features the new Pop of Pink Washi Tape and new Thoughtful Banners Photopolymer Bundle (stamp set & coordinating Duet Banner punch). This time I wanted to show off the coordinating products. I couldn't resist coloring in some of the lines from the stamped banner with my Melon Mambo marker.


Card # 3 features can you guess? Yes! The new Pop of Pink Washi Tape and new Thoughtful Banners Photopolymer Bundle (stamp set & coordinating punch). With this card I wanted to show a masculine card with the washi tape. I can picture people seeing the name Pop of Pink and thinking girly, but there are two washi tapes in the packet that do not contain pink. This card also features the new 2016-2018 in-color Emerald Envy cardstock and ink (used for sponging edges).


Scrapbook Page - I am behind in memory keeping our April trip to New Orleans. I made one Project Life page featuring the Memories in the Making Project Life collection which is retired. I highlighted the name of the ice cream in my photo with some triangle stickers from the kit and colored in the heart from the Project Life card with my Watermelon Wonder marker. I am drooling looking at that ice cream in the photo!


3D Item # 1 features the new stamp set Pineapple. The frame is 8x10 purchased at a local store. I stamped the pineapple 5 times on Shimmer White cardstock and fussy cut them out with my paper snips. What you can't tell in the photo is that I colored the pineapples with my clear Wink of Stella brush to add some luster. This project also features the Thoughtful Banners Photopolymer Bundle (stamp set & coordinating punch).


3D Item # 2 is a Mini Treat Bag featuring the new Pop of Pink Washi Tape & new Thoughtful Banners Photopolymer stamp set. For the washi tape hearts I tore a piece of washi tape and stuck it on a scrap piece of Whisper White cardstock then sent it through my Big Shot with the heart border then I cut away the excess. The heart border comes in the Mini Treat Bag Thinlit. I randomly stamped the i love you's, but you could certainly use some more washi tape or a stampamajig to line up your stamp more precisely.


I hope you enjoyed seeing my projects and that something above inspires you. Let me know if you have any questions. I look forward to sharing some more new projects soon.

Happy Stampin',
Christine

Wednesday, April 13, 2016

Love Story Project Life Book

I just got back from a week long vacation down in New Orleans. It was so wonderful - warm weather, sleeping in, amazing music, yummy food, spending time with hubby & friends. I can't wait to get our photos printed and start working on a Project Life book to preserve our memories.

I had hoped to share this post before we left, but I ran out of time getting ready for the trip. On Easter weekend my cousin Kelli got married and I decided to put together a 6" x 8" Project Life for the newlyweds as part of our gift. I kept the book very simple as I am hoping she can add photos of the wedding or honeymoon and journaling to make it her own. Here are a few images below. Most pages just featured the beautiful cards from the Project Life Love Story Card Collection.

Front envelope page featured their save the date and invitation:


On two of the pages I cut a piece of vellum cardstock 6" x 8" and glued cards back to back. These were the only cards I glued in the entire book.


The envelope page at the back of the book holds all the extra cards I didn't use in the pages of the book, the stickers, and journaling pens.


Let me know if you have any questions about my book? You can check out all the Stampin' Up! Project Life products in my Online Store by clicking here. Stampin' Up! corporate just announced the Weekly Deals as we know them are ending on Monday, April 18th so check out the products on sale through Monday.

Happy Stampin',
Christine

Products used: Kraft 6" x 8" Project Life Album, 6" x 8" Project Life Envelopes Pages, Love Story Project Life Bundle, Project Life Journaling Pens, Two Variety Packs 6" x 8" Project Life Photo Pocket Pages, Vellum 8 1/2 x 11 cardstock, Tear & Tape adhesive, Mini glue dots

Tuesday, March 22, 2016

Project Life Baby Book - Part 3

Earlier this month I shared some photos of a Project Life baby book I made for my coworker. She is due to give birth tomorrow and I am excited to see pictures of her little boy. Here are some additional pages from the book showing the accessories & envelope page.
For the first & second pages I cut a piece of vellum 6" x 8" and adhered the Project Life cards back to back:


Here are some pages where I used the embellishments in the accessory pack (I cut the wood banner in half with scissors):


Here is the envelope page I put in the back of the book with the extra cards, accessories, and journaling pens.


Let me know if you have any questions about Project Life? I hope my photos inspire you to give Project Life a try. You can find all the supplies used here in my Online Store.
Products used:
Kraft 6 x 8 Project Life Album, Two Variety Packs 6 x 8 Project Life Photo Pocket Pages, One 6 x 8 Project Life Envelope Page, Hello Baby Boy Project Life Card Collection, Hello Baby Project Life Accessory Pack, Project Life Journaling Pens, Vellum cardstock

Happy Stampin',
Christine


Saturday, March 12, 2016

Project Life Baby Book - Part 2


Here is the second part of the Project Life baby album I made for my coworker. Today I am showing the pages for months 6-12. 

If you aren’t familiar with Project Life it is a memory keeping system designed for the average non-crafty person. It is meant to get your photos off your camera or phone and into books to preserve your life’s memories. For this book I used the 6 x 8 album and pocket pages since I find this size easy to put together quickly. I cropped the images shared here so above or below them is an empty 4 x 6 area for my coworker to add a picture of her baby boy. The album will let her document the baby’s first year with pictures and journaling.

If you want to make an album of your own you can view all the Project Life collections in my Online Store. There is only about two and half weeks left of Sale-A-Bration so now is a great time to stock up on supplies for your albums. Until 3/31 with every $50 order you get to choose a Free Sale-A-Bration item. I will be stocking up on some supplies for an album for an upcoming trip in April. I hope my photos inspire you to give Project Life a try.


Let me know if you have any questions.


Products used:Kraft 6 x 8 Project Life Album, Two Variety Packs 6 x 8 Project Life Photo Pocket Pages, One 6 x 8 Project Life Envelope Page, Hello Baby Boy Project Life Card Collection, Hello Baby Project Life Accessory Pack, Project Life Journaling Pens


Happy Stampin’,Christine

Thursday, March 10, 2016

Project Life Baby Book - Part 1


In the past two weeks I shared the baby shower favors and baby card I made for my coworker who is due to give birth this month. I decided as soon as I knew she was pregnant to make her a Project Life baby book as her gift. It was so much fun putting it together I can’t wait to make another one!

Today I am sharing some pages for the first 6 months. Sorry some of the pages are a little blurry - I took lots of pictures very quickly once the book was already together in the plastic sleeve pocket pages.

If you aren’t familiar with Project Life it is a memory keeping system designed for the average non-crafty person. It is meant to get your photos off your camera or phone and into books to preserve your life’s memories. For this book I used the 6 x 8 album and pocket pages since I find this size easy to put together quickly. I cropped the images shared here so above or below them is an empty 4 x 6 area for my coworker to add a picture of her baby boy. The album will let her document the baby’s first year with pictures and journaling.

If you want to make an album of your own you can view all the Project Life collections in my Online Store. I’ll be working on a wedding album this month and will share photos once completed. I hope my photos inspire you to give Project Life a try.

Let me know if you have any questions.

Products used:
Kraft 6 x 8 Project Life Album, Two Variety Packs 6 x 8 Project Life Photo Pocket Pages, One 6 x 8 Project Life Envelope Page, Hello Baby Boy Project Life Card Collection, Hello Baby Project Life Accessory Pack, Project Life Journaling Pens

Happy Stampin’,
Christine

Tuesday, December 1, 2015

Project Life Hello December Day 1


Today I am beginning a 31 day challenge of showing my Project Life Hello December book. I am excited to be making my first Project Life book. I really got hooked on Project Life back in October when another Stampin' Up! demonstrator in my sideline did a presentation at a team meeting. A few weeks later that demonstrator Dawn passed away unexpectedly in a motorcycle accident. I will cherish the training she gave at that meeting.

In about 30 minutes tonight I built the base of my book by inserting cards into the page projectors in my book. For this spread I added the number 1 sticker to the card on the left and jotted down my journaling on a pre-printed card. It took only 5 minutes to complete. The Project Life concept was developed as a memory keeping system for anyone & everyone. With the accessory pack you can add embellishments to the cards and your photos or keep things nice & simple. 

I have a lot of ideas already jotted down for the 31 days in the month of December based on our holiday activities & traditions. I was a bit worried that I wouldn't be able to fill 31 slots and our life can be boring, but I am not going to let that stop me. I hope you'll enjoy following my December and will be inspired to give Project Life a try!

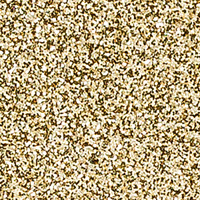
In other Stampin' Up! news today four new items came out in our Weekly Deals valid from 12/1 - 12/7. My pick of this week is the Gold Glimmer paper. You can visit my Online Store to check out Project Life products & the Weekly Deals. Let me know if you have any questions.

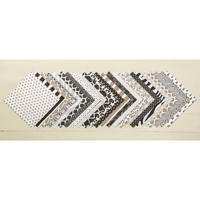
Go Wild Designer Series Paper Stack by Stampin' Up!
GO WILD DESIGNER SERIES PAPER STACK
Price$8.00 $6.00
Gold Glimmer Paper by Stampin' Up!
GOLD GLIMMER PAPER
Price$5.00 $3.75
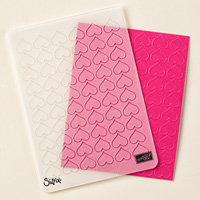
Happy Heart Textured Impressions Embossing Folder by Stampin' Up!
HAPPY HEART TEXTURED IMPRESSIONS EMBOSSING FOLDER
Price$7.50 $5.63
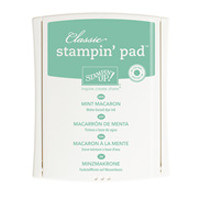
Mint Macaron Classic Stampin' Pad  by Stampin' Up!
MINT MACARON CLASSIC STAMPIN' PAD
Price$6.50 $4.88
Stamps: None!
Ink: None!
Paper: None!
Other: Kraft 6" x 8" Project Life album, Variety Pack 6" x 8" Project Life Photo Pocket pages, Hello December 2015 Project Life Card Collection, Hello December 2015 Project Life Accessory Pack, Project Life Journaling Pens

Happy Stampin',
Christine